
User’s Guide and New Features in Version 7
System Requirements
macOS 10.14, 10.15, 11, 12, 13, 14, or 15 Sequoia
Apple Silicon or Intel computer
Introduction
ContactPage Pro allows you to create image contact sheets with descriptive captions. Its intuitive interface makes it a snap to quickly build catalogs of pictures.
You can customize the contact sheet by selecting document dimensions, margins, page background, picture and text box size, shape or color, and by using the versatile options to compose descriptive captions – from picture name to dimensions to image color model to metadata EXIF info.
And with version 7, you can create, open and save documents or templates, add and remove pages, span frames to other columns or rows, create custom captions for images, import images to single frames, manually change the positioning of images, and much more.
Creating, Opening and Saving Documents or Templates
With ContactPage Pro 7 you can create documents that can be saved to disk and reopened later, retaining all the settings, images, and captions.
Use the File menu > New command to create a new document, or hit the + button at the top of the window. The splash screen allows you to select the main settings (page size, layout, number of pages, etc), but those settings can all changed later on.
Use the File menu > Open command to open a ContactPage Pro 7 document or template, or hit the + button at the top of the window. You can have up to 5 documents open at the same time.
Use the File menu > Save/Save As commands to save or save as any open document. You can select to save it as a ContactPage Pro 7 Document or a ContactPage Pro 7 Template. When saving as a template, only the layout and page settings are saved, without images or captions.
ContactPage Pro 7 saves all the current layout settings for the contact sheet, captions, and references to the images files.
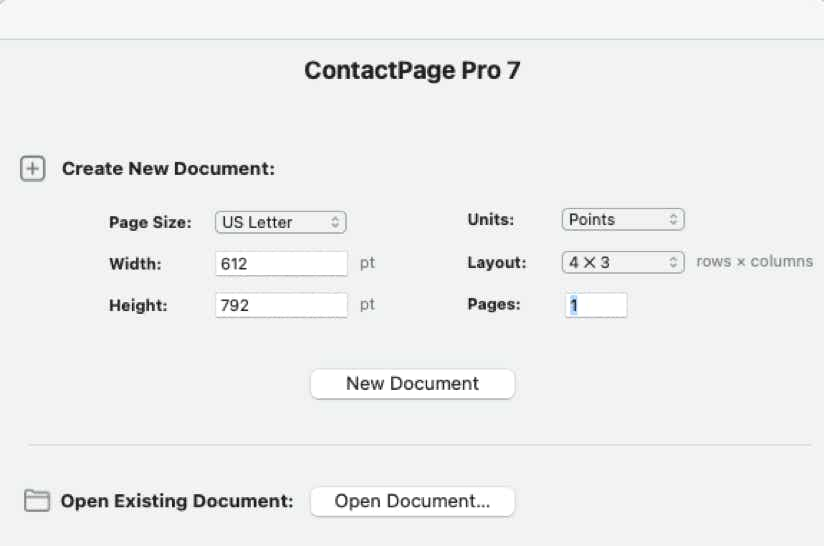
ContactPage Pro 7 Splash Screen. Allows to create new documents,
or open existing documents or templates.
Importing Images Using the Flow Images List
The Flow Images list contains the images that automatically fill any empty frame in the contact sheet, in the same order as they appear in the list. This was the default behaviour in ContactPage Pro 6 or older. Here you can add, remove, sort or rearrange the image flow, and any changes here will immediately be reflected in the current document.
Simply drop from the Finder any number of files or folders to this list, or hit the + button to bring the standard macOS Open dialog. See Application Settings below to customize whether to include files in subfolders, import all files or just picture files, and to whether add pages to fit all images when importing.
The picture list contains the picture name, icon, file size, file kind, the date they were last modified, and the page number in the document where they are located. Overflown images, that is, images that do not fit in any of the pages, are indicated with a red diamond.
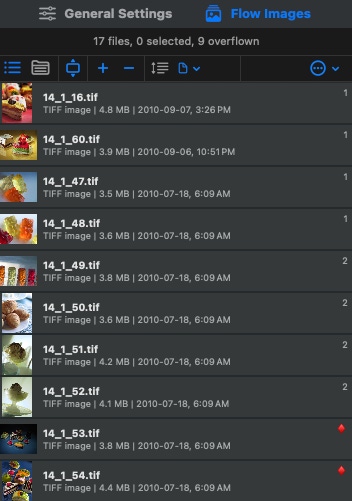
The Flow Images list contains the images that will be automatically placed in the empty image frames, in the same order as they are shown within the list.
Importing an Image into a Single Frame
With a single image frame selected in ContactPage Pro 7, hit ⌘E or click the Import Image button to import an image and place it in that frame. This will replace any previous image (if any). If the frame previously had an image from the Flow Images list, that image will then be moved to the next available image frame, and the entire sheet will change to reflect the new reflow.
Imported images are automatically embedded (see Embedding Images below). They cannot be moved to other frames or other pages of the document, but they can be unembedded and removed if desired (see below).

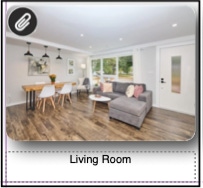
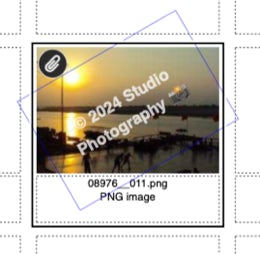
You can import an image into single frame.
The image will be embedded in the document (showing the paper clip icon), meaning that it won’t move.
Embedding Images
Any image from the Flow Images list can be embedded in the document. Embedding an image removes it from the Flow Images list, and ‘locks’ the image in place, meaning it will no longer move when you make changes to the Flow Images list. Images that you import into a single frame are also embedded by default. Embedded images are displayed in the document using a paper clip
Embedded images have additional advantages: they can have custom captions (that is, you can type any custom text), and manual placement (you can drag the image with the mouse to position it within its frame, or assign with precision its offset, angle or scale).
You can embed a single image, all images on the current page, or all images in the document.
Click the Embed Flow Image button for a single frame, or use the pull-down menu next to that button to embed images in batch (see right).
Unembed Images: Here you can unembed images in batch. From the dialog that opens, choose whether to unembed images currently selected, all embedded images on the page, or all embedded images in the document. After images are unenbedded, you can select whether to add them back to the Flow Images list, or permanently remove them from the document.
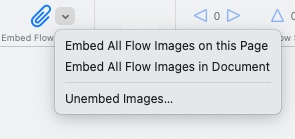
Embed a single image, all images on the page, or all images in the document using this button and pull-down menu.
You can also Unembed images in batch.
Skipping Frames
A skipped frame is a frame that won’t show in the final exported document (PDF or image file). In other words, they leave an ‘empty’ space. Flow images will skip this frame and use the next available one.
You cannot import an image into a skipped frame, or insert a caption. In addition, frames containing embedded images cannot be skipped.
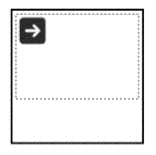
Skipped frames won’t display anything in the final
exported PDF or image file.
Row and Column Spanning
Single frames can be spanned down into other rows, or right into other columns. When you span a frame, it resizes to take up the space filling the additional row or column. You cannot span frames into rows or columns occupied by frames with embedded images.
The number shown under Row Span or Column Span indicates the number of rows/columns that frame has been spanned. Any frame with span applied can be contracted back to its original form.
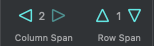
Use the span buttons to increase or decrease
the row or column span amount for a single frame.
Image Placement
By default, ContactPage Pro 7 places each image using the Automatic Placement. This means that each image will be positioned within its image frame using the Auto Placement settings under General Settings. There you specify the scaling (Fit, Fill, Stretch, etc.), and positioning (top left, centered, etc.).
However, you can change it to Manual Placement, and adjust the offset, scaling and angle for any particular image. Only embedded images can have manual placement. ContactPage Pro will show a warning for flow images that the image has to be embedded in order to do this.
With manual placement, you can simple drag the image with the mouse to reposition it and crop it as desired. You can also change its scaling and add a rotation angle.
If you wish to change the placement type for several images in batch, select Change Placement Type for All Images from the pull-down menu.
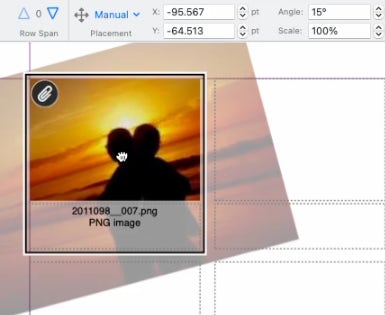
Use Manual Placement to adjust the positioning, angle or scale of single images. You can simply drag the mouse to reposition the image within its frame.
Automatic and Editable Captions
When you specify the contact sheet to have text frames (General Settings > Layout > Add Text Frames), ContactPage Pro 7 will create captions for each image using the Automatic type by default. This means that each caption will be filled using the tokens and custom text setup under Automatic Captions (General Settings > Automatic Captions).
But to have more control, you can change the caption type of an image to Editable. Editable captions allow you to enter any custom text, including emojis and special characters, or to remove the entire caption for that particular image. Only embedded images can have editable captions. ContactPage Pro will show a warning for flow images that the image has to be embedded in order to do this.
If you wish to change the caption type for several images in batch, select Change Caption Type for All Images from the pull-down menu.
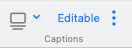
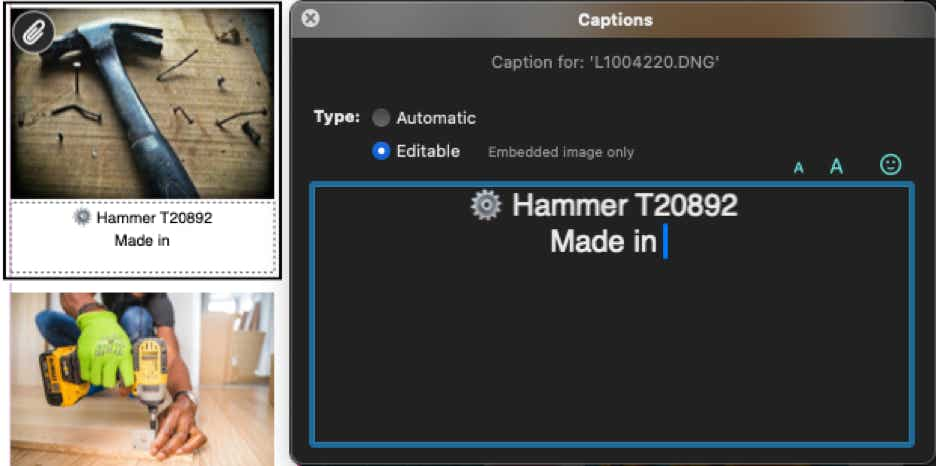
Embedded images can have editable captions.
Just change the caption type, and enter the desired caption for the selected image.
General Settings > Contact Sheet
Specify here the general settings for the entire contact sheet:
– Pages: Choose here page size (width and height), and orientation (portrait or landscape).
– Margins: Allows you to select page margins. Margins are used by ContactPage Pro to determine the actual area in which the contact sheet will fit (picture and text boxes cannot lie beyond the margins).
– Layout: Select here the number of rows and columns, whether to add text frames, the width and height of image and text frames, the offset of text frames, and the layout type:
– Background: Select to add a background to all pages. Choose Color Fill or Image as the background type. For Color Fill, select the color you want to use. For Image, select the image file, and the fitting type (Original Size, Scale to Fill Page, Stretch or Tile).
– Headers and Footers: Select to add headers and footers for each page:
– Watermarks: Allows you to add watermark for each image or page.

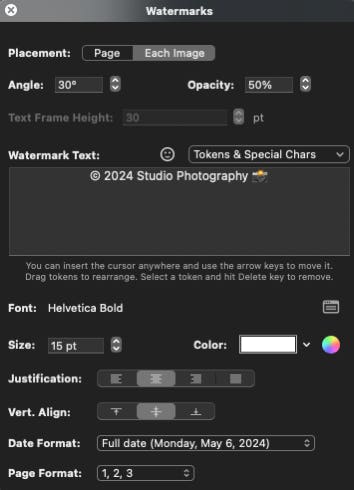
Watermark sample and settings.
Options for General Settings > Contact Sheet.
General Settings > Image Frames
Specify here the general settings for all image frames:
– Attributes: Select the following image frame attributes:
– Auto Placement: Select here how images with Auto Placement will fit their image frame:
– Stroke: Select to add a stroke to the image frames. When selected, choose the Style (Solid or Dashed), Weight and Color.
– Drop Shadow: Turn on to add a drop shadow to the image frames. You can specify its Angle, Color, Offset, Blur, and Opacity.
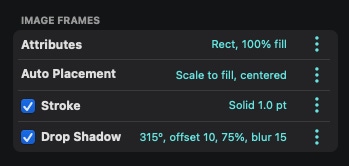
Options for General Settings > Image Frames.
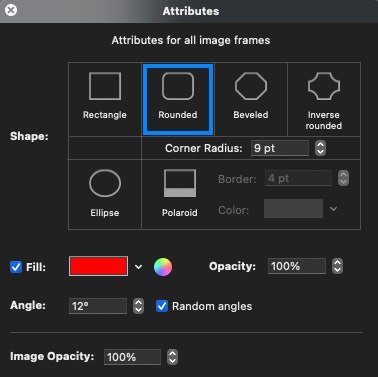
Attributes you can select for all image frames and sample.
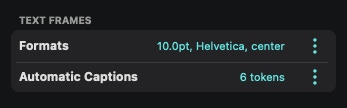
General Settings > Text Frames
Specify here the general settings for all text frames:
– Formats: allows you to specify the text formats for all captions.
– Automatic Captions: Choose here how to compose captions for frames with Automatic caption type. Frames with Editable caption type will be ignored.
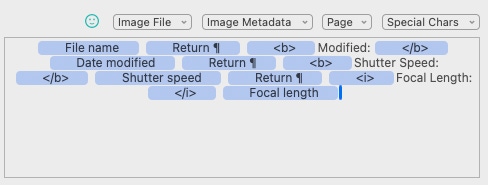
Some of the tokens are variable placeholders (such as Image File > Name, which changes according to the file name of each image), and others are fixed (such as the En dash). You can use as many tokens as you’d like, combined with special characters or any custom text.
Tokens are represented in blue, and they behave as a whole character entity. Use the arrow keys on your keyboard to move between tokens. Drag tokens to rearrange them. Select a token and hit the Delete key of your keyboard to remove it.
Certain tokens, such as those from the image metadata, will be left blank if they are not applicable, or if they are not present.
You can make certain text bold or italics using the Bold Start/End and Italics Start/End tokens (see sample on right).
Options for General Settings > Text Frames.
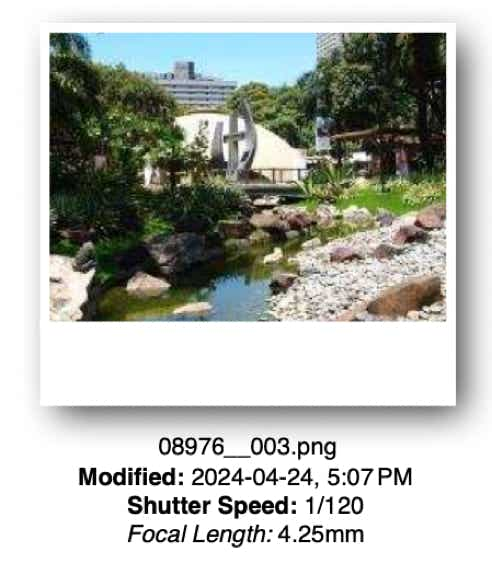
An example of an Automatic caption composed of 13 tokens,
showing image metadata, and using the Bold Start/End and Italics Start/End tokens.
Adding and Removing Pages
With ContactPage Pro 7, you can add and remove pages to the contact sheet.
– Add Pages: click the + button to show the Add Pages dialog. You can add pages at the end or beginning of the document, or before/after the currently selected page.
If the Application Setting ‘Automatically add pages when necessary’ is set, ContactPage Pro will add pages automatically when adding images to the Flow Images list in order to fit all images.
– Remove Pages: click the – button to remove the pages that are currently selected. To select multiple pages, use the Shift or Command keys while clicking on the page icon you wish to add or remove to the selection.
– Remove Empty Pages: From the pull-down menu, select Remove Empty Pages to remove at once all the pages that are empty. An empty page is a page that has no images.
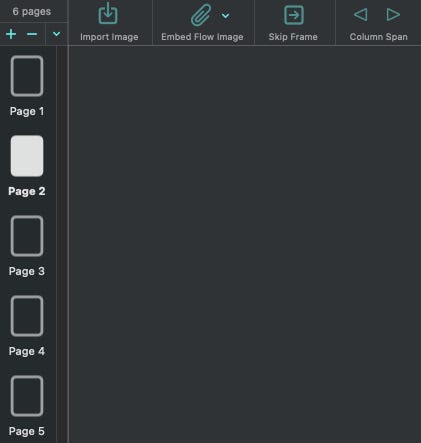

Adding pages to the document.
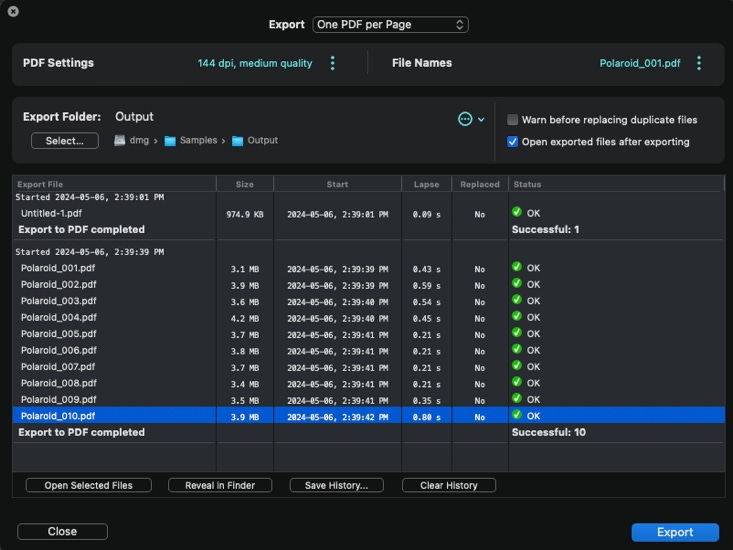
Exporting Documents
Click the Export button to export the document to disk. The Export window shows a history of all exported files since ContactPage Pro was last launched.
Specify here how to export the document:
– PDF Settings:
– Image Settings:
– Export Folder: Specify here the folder where all the PDFs or image files will be exported. ContactPage Pro 7 keeps track of up to 10 recent folders.
– Warn before replacing duplicate files: When selected, ContactPage Pro will display a warning message if a PDF or image file with the same name as the one being created already exists in the export folder. If not selected, ContactPage Pro will always replace any duplicate files if necessary.
– Open exported files after exporting: Select to automatically open with the default application the exported PDFs or image files after exporting.
Application Settings
These are the preferences settings for the entire application. They are saved with the application, not with each document.
– Units: Choose the units to display width and height amounts.
– Show image dimensions considering resolution: When selected, ContactPage Pro 7 will display image dimensions taking into account the image resolution (as in ContactPage Pro 6). If deselected, the amounts shown will be the number of pixels.
– When adding files, import: Select if only images and PDFs that conform to recognizable image files (.jpg, .psd, .eps, etc) will be imported when adding files to the Flow Image list, or all files.
– Include files in subfolders when importing images: Select this option to include pictures located inside subfolders as well when adding files to the Flow Image list.
– Automatically add pages when necessary (Flow Images list only): select to automatically add pages to the document to fit all images.
– Reset ‘Don’t Show Again’ warning: Click this button to reset warnings that include the “Don’t Show Again’ check button.
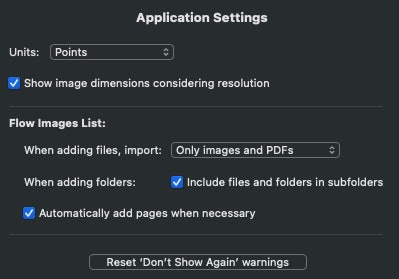
Application Settings.
What’s Removed in Version 7
These features were removed in ContactPage Pro 7 due to redundancy or incompatibilities with newer systems or technologies:
– Slideshow. Workaround: You can make a slideshow after opening the PDF(s) in Preview.app (View menu > Slideshow).
– Creating Adobe InDesign or QuarkXPress documents: AppleScript changes in latest macOS releases made it impossible to communicate reliably with these applications.
– Custom Presets. Workaround: Save documents as Templates instead.
Version History
7.1.1 – November 12, 2024
• Integration with PayPro Global, our e-commerce credit card processor.
7.1.0 – July 1, 2024
• New application preference to show image dimensions considering image resolution
• Removed trailing zeros from image dimensions
• Preview contextual menu now includes ‘Show Image Info’ and ‘Show/Hide Images’
• New ‘Remove’ button to remove the selected page background image
• Fixed flow images linkages not displaying correctly
• Removed subscription purchases, and replaced with time-limited and perpetual licenses (existing subscriptions remain valid until canceled)
• Removed Order ID as requirement to activate serial number
• Several small fixes and improvements.
7.0.1 – May 3, 2024
• Fixed activation issues.
7.0.0 – April 29, 2024
• Initial release.
©1998–2025 Badia Software
All rights reserved.